Welcome back to my column where I will share best practices for Flexo Wash technology and common flexo challenges. I want to answer your real world questions, so be sure to send them to me at: service@flexowashus.com and we will feature them in an upcoming column. As your partner, I look forward to handling all your issues as soon as possible and offer lessons learned.
Problem: My Plate Washer is eating my plates!?
Answer: Check your rollers and your brushes. Read more to solve your specific problem.
We get the occasional call from our plate washer customers that the unit is “Eating My Plates!” While Flexo Wash offers different-sized plate washers for different-sized plates, the construction of the wash area is the same for all units. Today I’d like to go over some reasons that your Flexo Wash unit may be “eating your plates”.
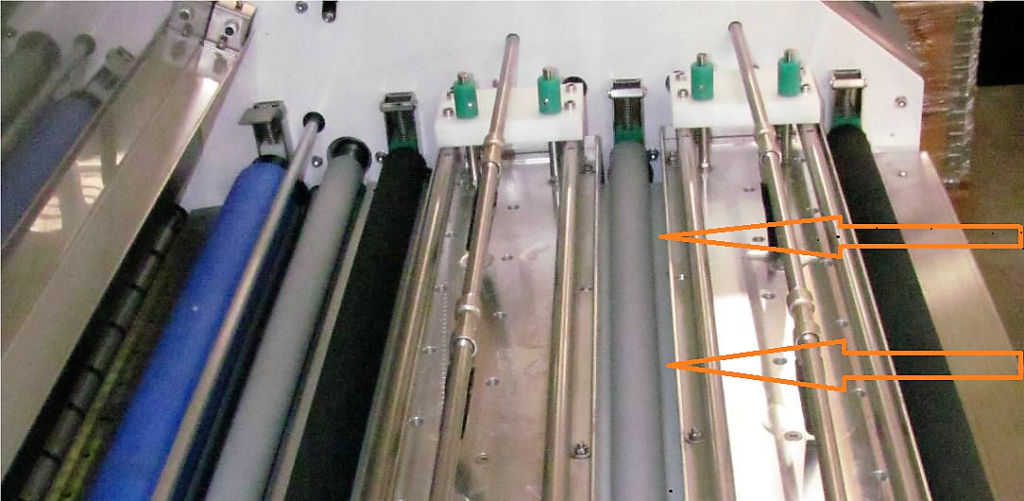
On all plate washers, there are a set of rollers right at the entry point. These rollers grab the plate and help guide it through the unit. The upper roller is held in place by springs and clips, while the bottom roller is driven by a chain and sprocket. This spring setup provides tension and allows the upper roller to move up as a plate passes through. The roller setup is in place throughout the unit.

If these rollers have an excess amount of ink on them, this can increase the amount of tension on the plate as it goes through the rollers. This increased tension can cause the plates to either curl up and around a roller or cause the plate to curl downward and into the drain basin — thereby “eating the plate”. Also, if the rollers have swollen over time or have been damaged, this can cause the plate to curl downward. So, it is important to make sure that the rollers are clean and are not swollen or damaged.
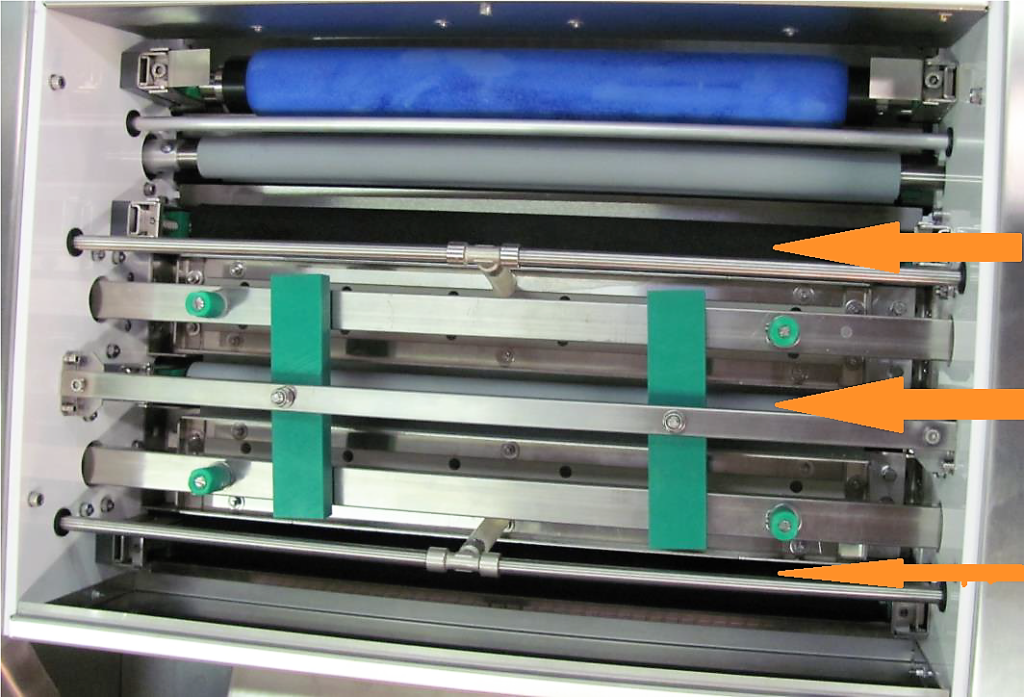
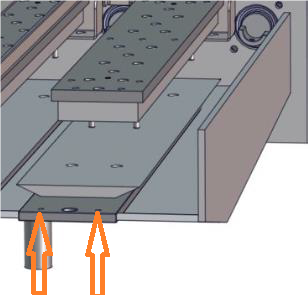
The second (and most common) reason that plates may be getting into the drain basin is the position of the brush planes in relation to the lower rollers. Underneath the cleaning brushes, there is a plastic brush plane and a metal brush plane support. The plastic brush plane is what supports the back side of the plate as it passes through the cleaning brushes. This brush plane has a mitered edge and should almost be touching the lower drive roller. The plastic brush plane also sits firmly on the metal brush plane support. Please note that in the below picture, the drive roller is underneath the upper roller.

If there is a lot of ink residue between the plastic brush plane and the metal brush plane support, the brush plane will lift and create a gap between the lower roller and the brush plane. Plates can get into that gap and end up in the drain basin. Periodic cleaning of the plastic brush plane is required to remove any buildup underneath it. On newer units, the plastic brush plane is secured to the metal support via bolts. This is not the case on older units. So, on older units, it is possible that the brush plane has become warped over time and needs to be replaced. We do sell replacement brush planes and we also offer the new secured brush plane/brush plane support assembly.
If your brush planes are clean and sit correctly into the brush plane support and you still have a gap between the roller and the brush plane, there is an adjustment that can be made in the brush plane support to eliminate that gap.
Underneath the brushes, there are two bolts on each side of the brush plane support. These bolts have a jam nut on them. After removing the brush, back of the jam nut and then tighten or loosen the bolts to raise/lower the brush plane support. Remember, leave the plastic brush plane in place so you can see the gap in relation to the lower roller. When you have the gap eliminated, tighten the jam nuts back down and put the brush back in.

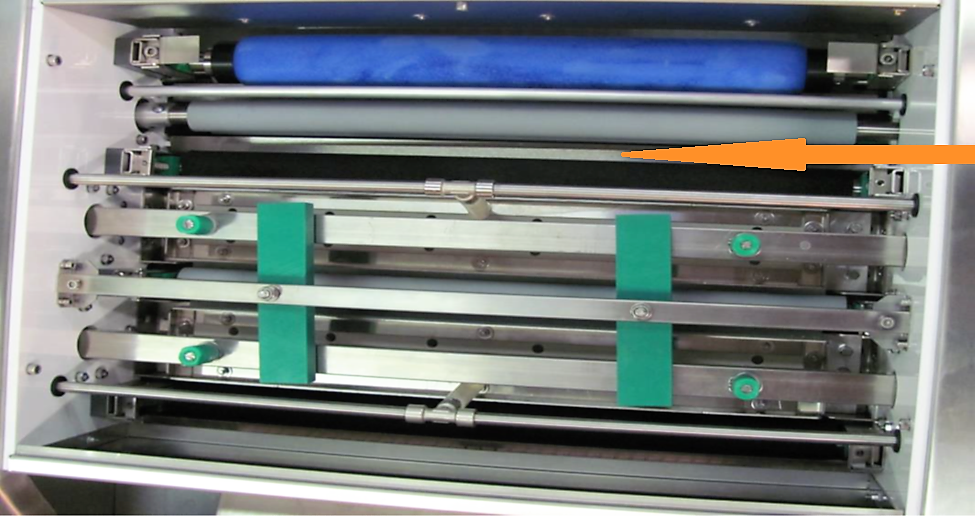
Sometimes, plates will be “eaten” back by the sponge roller. The same rule applies to the rollers: are they clean and not swollen/damaged? The setup by the sponge roller is a little different: the drive roller is on top and the floating (spring-loaded) roller is on the bottom. There is also a metal plate between the last semi-hard roll located before the upper drive roller. If this plate is out of alignment, plates can drop below the sponge roll.

In closing, make sure that all of the rollers are in good shape and all of the spacing items discussed above are correct. If you need a replacement part, just give us a call for a quote. Finally, check out our video that shows you how to disassemble, clean and reassemble a plate washer below. This video will give you a better understanding of how the cleaning area of the plate washer goes together.
